About Jake Reinig

Author Archive | Jake Reinig

Declan Redux

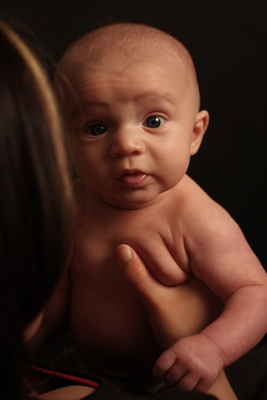
I got together with Mr. Declan Gill and his parents again tonight. He was alternately cranky and happy, but a pretty good subject either way. Even shooting with my sublime 50mm f/1.4 lens I still had difficulty getting a fast enough shutter speed to freeze him. Next time we meet for a shoot I’ll explain the finer points of shutter speed and aperture. Maybe then he’ll sit still for a bit. ;)

I’m still working on getting a larger collection together, but I’d though I’d post some samples until then:

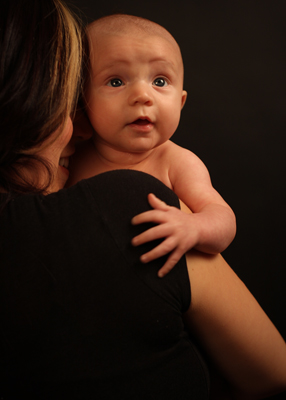
D with his momma:

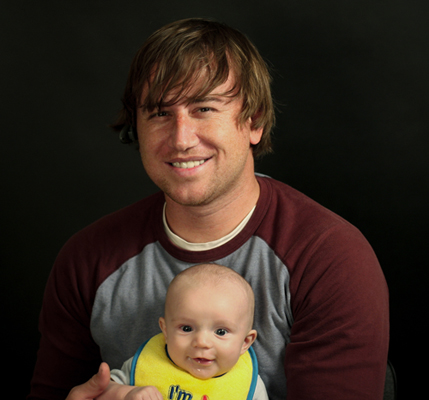
D and me, shot courtesy of Trevor:

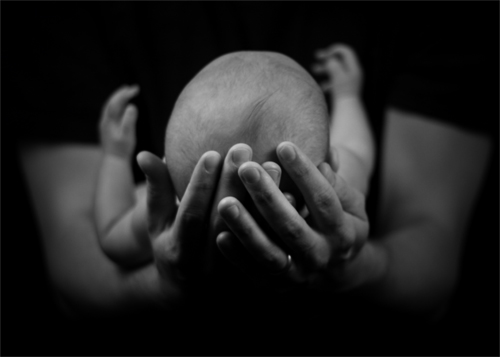
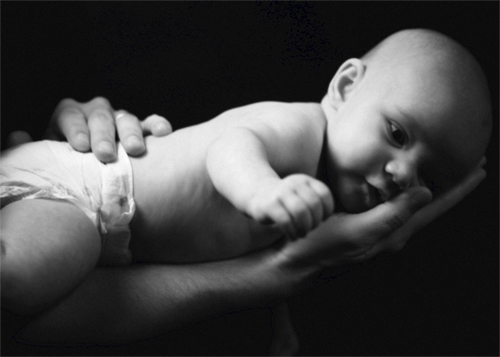
We tried to get a nice, calm picture of D resting in his dad’s hands, but we tried to do this upfront when he was hungry and all shaky-like. As you can guess, it didn’t work out all that well. :) Here’s one of the better ones:

Gear used: Canon 40d with 50mm f/1.4 lens, Expodisc warm balance filter, Smith Victor basic light kit and Port-a-Stand background stand.

Comments { 1 }

Solution: “Stuck” Canon Flash Problem

The built-in flash on my Canon 40d has not been cooperative lately. It refused to pop open and play. Ordinarily, this isn’t a problem, as I use my Speedlite most of the time. But alas, the one time I needed it, it refused to open. I’m writing this post so that anyone else searching for this same problem can get the flash working again.

The symptoms of my problem:

  • Pressing the flash open button wouldn’t open the flash.
  • Putting the camera in any of the basic zones in dark lighting would not open the flash
  • Under the “Flash Control” menu option, going to the “Built-in flash func. setting” would return an error stating “This menu cannot be displayed. External flash is attached” even though no flash was attached.

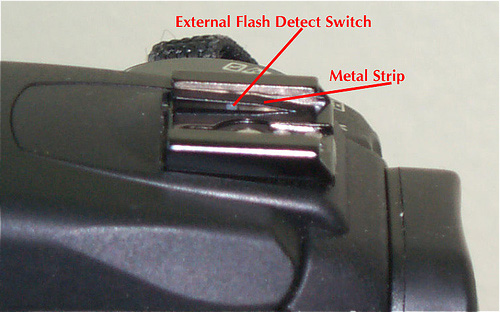
The problem, as it turns out, is related to a switch located under a plate in the hot shoe. The following picture is from this Flickr thread:

http://www.flickr.com/photos/dougpardee/133066175/

That little ‘External flash detect swith” is tiny (on the 40d it’s black, not silver), and from what I understand, is found on most of the Canon SLRs. If dust or sand or something gets in under the metal strip, it can hold the switch down, which makes the camera think a flash is attached.

In my case, it was an easy fix. I used the end of a finger nail file thing from a nail clipper, slid it in there carefully, and kind of blew air in. That cleared the obstruction and the switch popped back up. The camera was then able to pop open the built-in flash.

Comments { 126 }

Casino Point, Catalina Island

Note: if you hear sound, scroll down to the bottom of this post and press pause. Chances are the video is autoplaying when it shouldn’t be. That said….

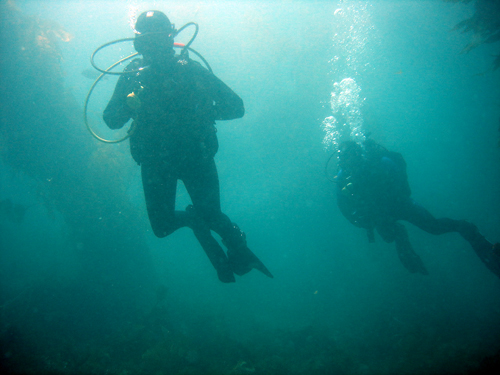
I, and my friends Ben and Sonja took the Catalina Express over to Avalon Saturday to do some diving at the Casino Point dive park. The morning started out a little cold and overcast, but within a few hours the day turned beautiful. The diving was just as good, with excellent visibility, no current, and decently warm water. Alas, I don’t have many photos to share, but here’s a sample.

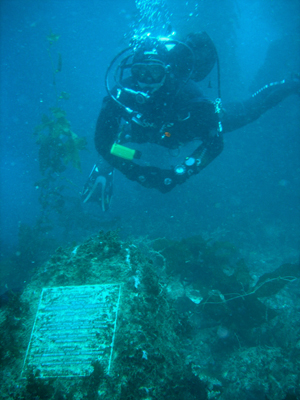
Here’s me with the Jacques Cousteau honorary plaque:

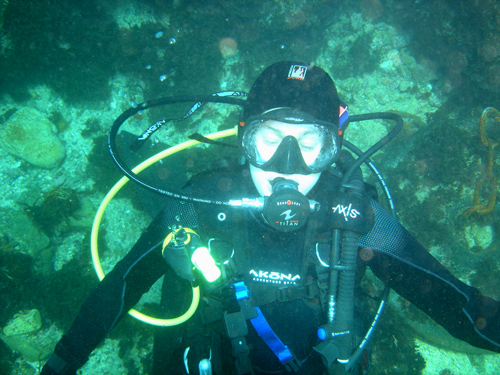
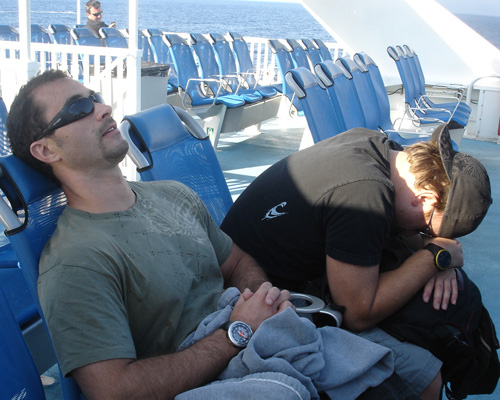
Sonja, apparently napping on the bottom:

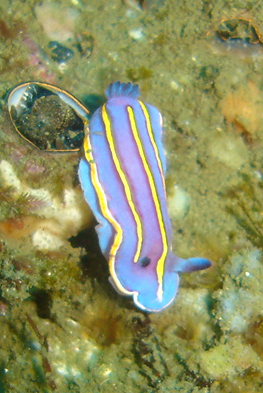
I found this nudibranch on one of the wrecks. He was around 1 inch long. Not sure what species it was, but it was beautiful in person.

Ben and Sonja work their way through the kelp:

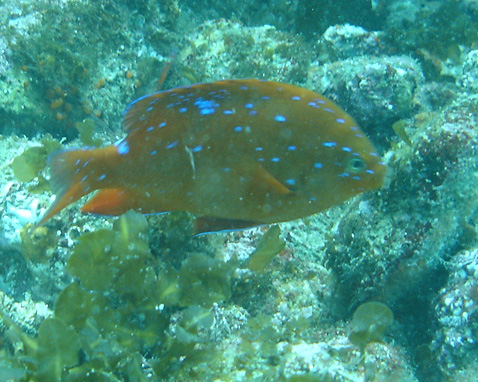
A juvenile garibaldi, with its opalescent spots:

Ben and I after a veeeeeery long day in Catalina:

This video isn’t particulary interesting, but I put it up so that you can see a sample of what diving in the park is like. Lots of kelp and sunshine. I’m holding the camera, and that’s Ben’s rear in the lead. If you want to download the whole video, or just want to open it in its own window, click here.

Comments { 0 }

Mr. Declan James Gill, Lady Killer

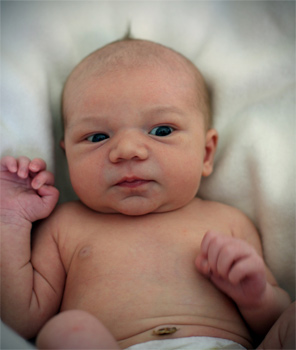
It took him a while to arrive, but Becky and Trevor’s new son is finally here. They needed a photo for their birth announcements, and I was only too happy to oblige. I think big D was about a week old when we did this.

Much to my surprise, Declan was actually one of the hardest subjects I’ve ever photographed. I haven’t been around a newborn in years, so I had forgotten how active they were. Declan was full of energy, and despite promises of money and candy, he didn’t stay still much. Cute kid, but he doesn’t listen very well.

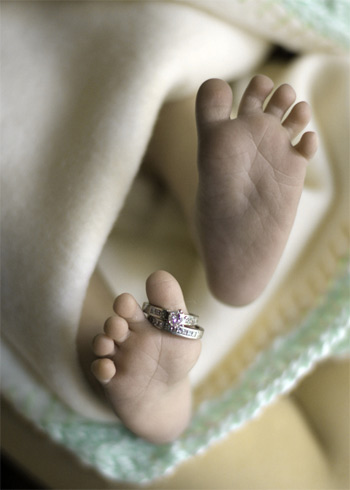
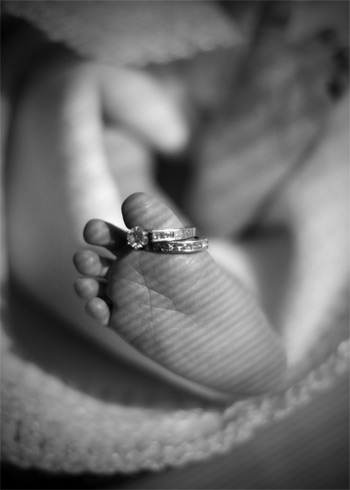
Two more, experimenting with Becky’s rings on his feet. I’m not sure where she got the idea from, but I think it’s rather cute.

The screen door was used as a gobo for this shot, adding a little bit of crime noir to the scene. ;)

The poor guy was having a tough time of it in the warm blanket and Trevor was in a hurry to get to his soccer game, so we cut it short. As much as Becky loves this child, I suspect that we’ll be doing quite a few more shoots in the future.

Comments { 0 }

Understanding Shutter Speed

There are three components to every exposure: shutter speed, aperture, and ISO speed. In order to get a correct exposure, each of these three values must be adjusted in a relationship. We’ll look at how that relationship works in a subsequent article, but for now, we’ll look at shutter speed.

The shutter on your camera controls two different aspects of each picture: the amount of light that can hit your film or sensor, and the amount of motion blur that may or may not result.

Let’s look at the light aspect first. Shutter speeds are notated by lengths of time, such as 1 second, 1/2 second, or 1/1000 of a second. The longer the shutter is open, the more light will be recorded on our film or sensor.

Let’s suppose that you’re thirsty, and that a 12 oz glass of water would be enough to quench your thirst. You can fill the glass slowly or quickly, but at some point the glass is full. This is the correct amount of water. If you leave the faucet open for too long, it will overflow and you’ll have wasted water. If you turn it on for too short, you’ll still be thirsty.

The shutter is very similar. If you open it for too long, too much light will enter your picture and it will be “blown out.” You’ll have wasted the photo. If you open the shutter for too short a length of time, you won’t have “poured” enough light into your photo and it will be too dark.

The second consideration we have about shutter speed is how it affects the blur (or lack thereof) in our picture. Let’s say that we want to take a photo of a jogger. Our camera tells us that a 1-second shutter speed is needed to get a proper exposure. If we keep the shutter open for 1 second, the jogger will have traveled several feet and our camera will have recorded the entire sequence in one big blur.

On the other hand, if we had used a shutter speed of 1/250 of a second, the jogger might not have traveled any distance. Consequently, our jogger will seem as though they’re frozen in time.

For most pictures, we don’t want any blurring to occur. In these situations, it’s important to use a fast shutter speed to freeze the action. Note that we humans often shake a little when holding a camera (heavy ones in particular), so we need to make sure our shutter is faster than our movement is. Many photographers try to use a shutter speed of 1/125 S or faster when hand holding their camera to prevent their shaking from blurring the photo.

In some cases, you want to imply motion, so you would choose a longer shutter speed. You might do this to make star trails at night or to record the paths of tail lights from cars. If you have the option, it’s often useful to use a tripod to minimize undesired blurring.

Comments { 0 }

Understanding Aperture

There are three components to every exposure: aperture, ISO, and shutter speed. In order to get a correct exposure, each of these three values must be adjusted in a relationship. We’ll look at how that relationship works in a subsequent article, but for now, we’ll look at aperture.

Aperture controls two aspects of every photo. The first is the amount of light that strikes our film or sensor, and the second is the depth of field in our image (more on that in sec).

Let’s look at the light issue first. Imagine that you have a pair of sunglasses on. If you add another pair on top of the first, the amount of light that can reach your eyes is reduced. If you add more sunglasses, the light reaching your eyes will be reduced still further until you add so many that the scene is too dark and you can’t see anything. On the other hand, if you don’t have enough sun protection on, the scene might be too bright and you’ll have to squint.

The aperture opening is similar to this. The bigger the aperture, the more light can get to our digital sensor. The smaller the aperture, the less light can get in (sort of like adding or subtracting sunglasses). What confuses a lot of new photographers is that bigger apertures are represented by smaller numbers. For example, f/2.8 is a larger aperture than f/11. This is because the aperture is a ratio, the details of which we don’t need to get into now. You just need to know that when you’re considering which aperture to use, the smaller the number the greater the amount of light.

The second aspect of photography that aperture affects is called the “depth of field.”  In it’s simplist form, this is the amount of our picture that is in focus. (It may be helpful to think of depth of field as “depth of focus.”) As a general rule, the larger the aperture, the less of our picture will be in focus.

For the sake of illustration, let’s suppose that we’re taking a picture of a flower in front of a bush. The flower is about 3 feet from our camera. If we shoot with a larger aperture (say f/2.8), the flower will be in focus and the bush in the background will likely be out of focus. If we shoot with a smaller aperture (say f/22), the flower and the bush will probably both be in focus.

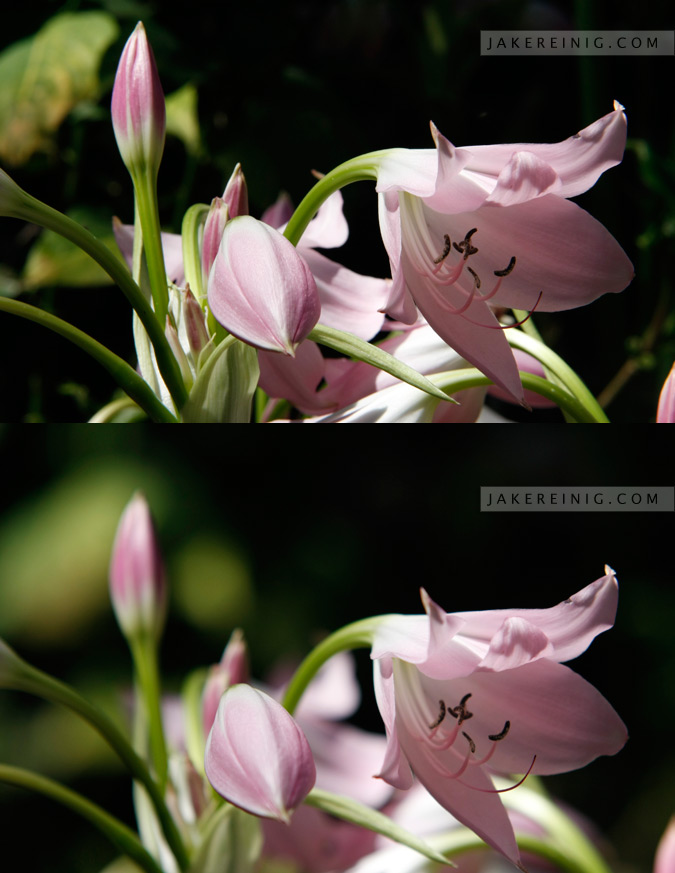
Look at the pictures below. The top picture uses an aperture of f/16, and we can see that the bush in the background is somewhat in focus. In the bottom picture, we’re using f/2.8. Note how the bush in the background is now very blurry, and parts of the surrounding flowers in the foreground are also starting to blur.

The top picture is f/16, while the bottom is f/2.8. Notice the large shift in depth of field.

Which type of effect you choose is a creative decision, although at times it may be determined by the amount of light in the scene. For example, if you want to have an entire scene in focus but it’s dark out, you may need to use a wide aperture to let in more light. Doing this might reduce the depth of field. The opposite would be true of course: if it’s very bright out you may not be able to use a large aperture, and may get more of the scene in focus than you desire.

Comments { 0 }

Putting It Together: Understanding Exposure

In previous sections, we’ve looked at each of the individual puzzle pieces that go into making a final exposure. To recap:

Shutter speed controls motion blur (or lack thereof) as well as the amount of time that light can strike the sensor (or film). The longer we keep the shutter open, the more light that will hit the sensor. At the same time, if the shutter is kept open for too long, items in the picture may look blurry from movement.

Aperture controls the depth of field (how much of the image is in focus), as well as the amount of light that can hit the sensor. Generally speaking, as we increase the size of the aperture, we decrease the amount of our image that will be in focus. Additionally, if we use a wider aperture more light will hit the camera sensor. Don’t forget: larger apertures are expressed as smaller numbers: f/2.8 lets in more light than f/22.

The ISO is the measure of how sensitive a digital sensor or film is to light. As we increase ISO, the more sensitive our sensor is. However, as we increase the ISO, the more likely we are to introduce “noise” into our exposure, degrading image quality.

So…how do we put this all together? Basically, as we change one of the above items, we need to change the other two to ensure a correct exposure. To help illustrate this, let’s do a tiny bit of algebra:

Shutter Speed + Aperture + ISO = Exposure

Forget for a second what the real values of those need to be; let’s assume that they should all be a value of 1, whatever that means. By adding them up, our correct exposure should be 3:

S + A + I = E

1 + 1 + 1 = 3

Let’s say that we want to double our shutter speed because we’re getting motion blur. If we still want an exposure value of 3, we will need to adjust either our aperture or our ISO, like so:

S + A + I = E

2 + 0 + 1 = 3 or

2 + 1 + 0 =3

If we double our shutter speed but don’t compensate by changing one of the other items (aperture or ISO), our exposure will be too dark. In this case, we get a value of 4, which is wrong:

S + A + I = E

2 + 1 + 1 = 4

In the real world, which of the three exposure pieces you change will depend on a number of factors, but most often it will be for creative control. For example, let’s say that you want a very shallow depth of field, so you open the aperture as wide as you can. In doing so, you may let in too much light, so you can make the shutter speed faster (e.g. go from 1/125s to 1/250s), or can decrease the ISO (e.g. 400 to 200).

Suppose your camera is set to the following: 1/125s, f/4, and ISO 1600. You look at the picture and are unhappy with the graininess resulting from the high ISO. To compensate, you step the ISO down to 400. If you don’t change the aperture or shutter speed, your image will be too dark. So which do we change?

If we slow down the shutter speed to 1/30s, we’ll let in enough light, but our subject might get blurry. And unless you have a really expensive lens (or something called a “prime” lens), there’s a good chance you won’t be able to open your aperture past f/2.8, which you would need.

The answer then is probably to change both. If we change the ISO from 1600 to 400, we’re adjusting the exposure 2 stops. We can recover those stops by changing the shutter speed and aperture 1 stop each. In this case, that would mean changing the shutter to 1/60s and the aperture to f/2.8. At 1/60s, it’s possible you may be able to avoid a blurry subject, in which case your exposure will have worked.

The easiest way to begin expirmenting with these relationships is to try out your camera in either aperture or shutter priority modes. In these modes, you pick either the aperture or shutter speed, and the camera automatically sets the other one for you. Try using the camera in one of these modes and then changing the aperture/shutter speed. See what the camera does to the other when you make the change.

Comments { 0 }