Archive | Articles RSS feed for this section

Reche Canyon: Destroyer of Worlds

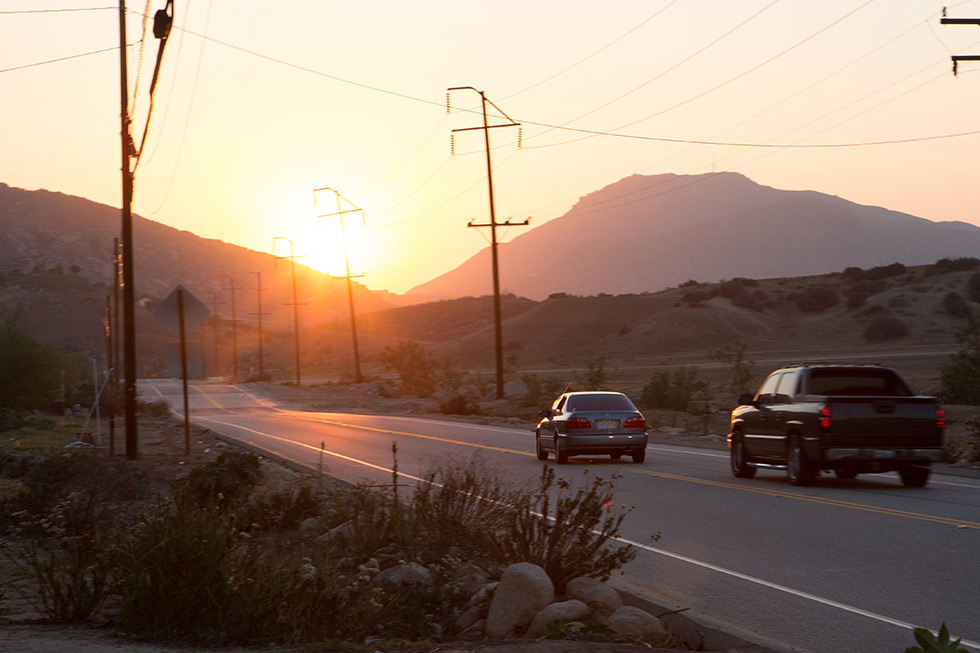
In the relatively average town of Colton, California, is a relatively non-average thoroughfare called Reche Canyon Road. This road likes to kill people.

Strictly speaking, the road itself has no specific feelings towards people either way. What it does have, however, is a series of problems:

  1. It’s only two lanes, and does not have any safety dividers
  2. Besides serving local traffic, Reche Canyon also serves drivers traveling between Colton and Moreno Valley.
  3. Approximately 102% of these through-drivers are vision impaired, aggressive a-holes who enjoy passing each other despite the fact that it’s dangerous and illegal in most places.
  4. As an added bonus, the canyon has wild donkeys living in it. These donkeys are dumb.
  5. Various dumb people who are dumb feed the dumb donkeys, which then sometimes congregate on/near the road and pretend to be slalom poles.

In the multitude of times I’ve driven the road (my girlfriend and some friends live nearby), I’ve never seen a police officer on the road. I’ve never seen a construction crew adding safety dividers. I have, however, seen numerous people nearly hit each other (and me). I’ve also seen more roadside memorials than on any other SoCal road that I can remember.

There have been at least two fatalities on the road this year (1,2), as well as a number of other collisions, like this one. Lots of other people have died over the years, like this guy, this guy, and this guy.

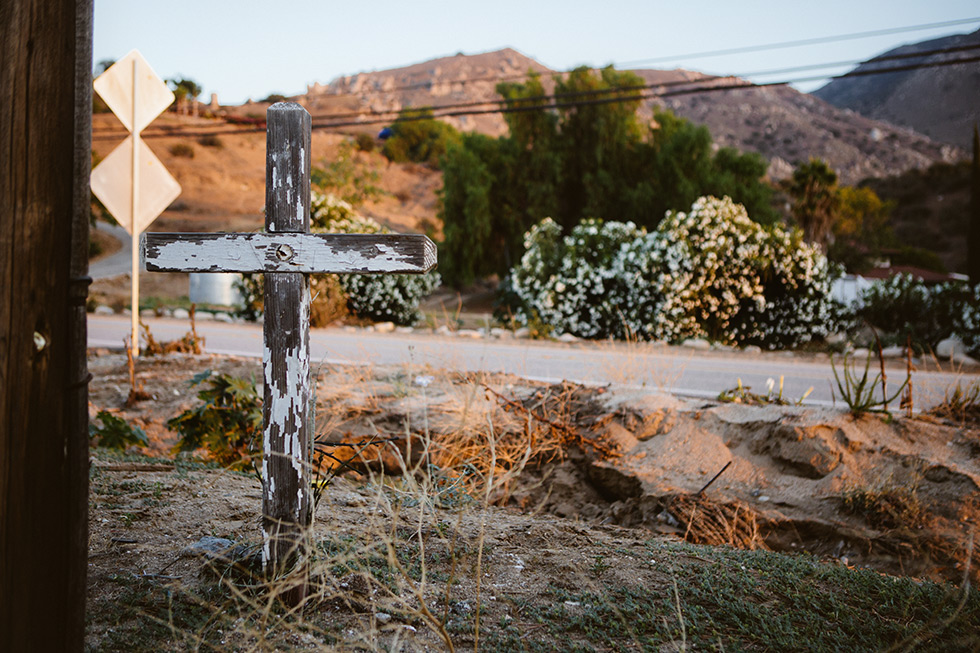
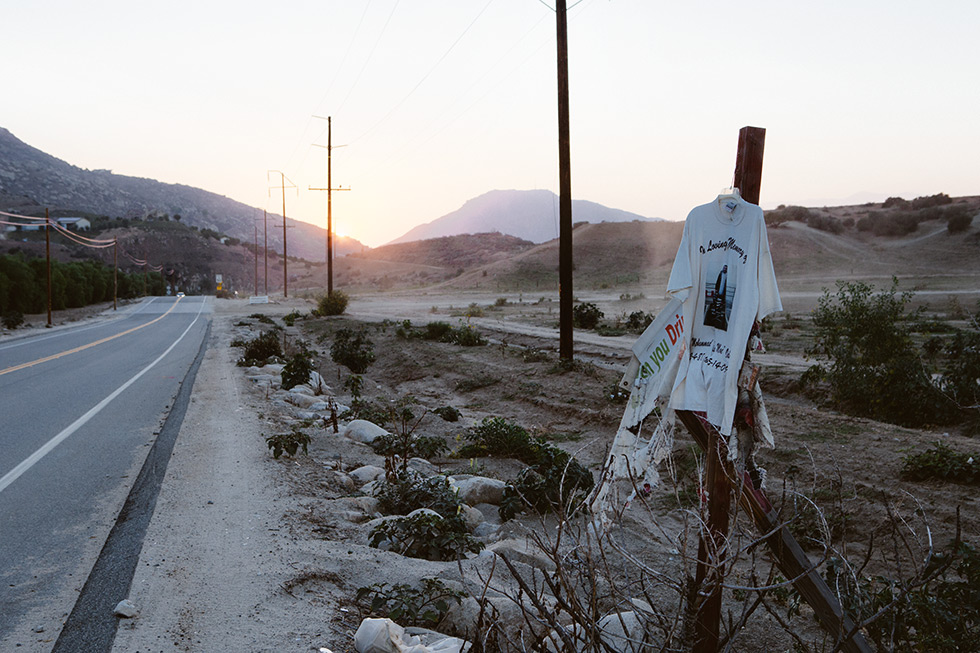
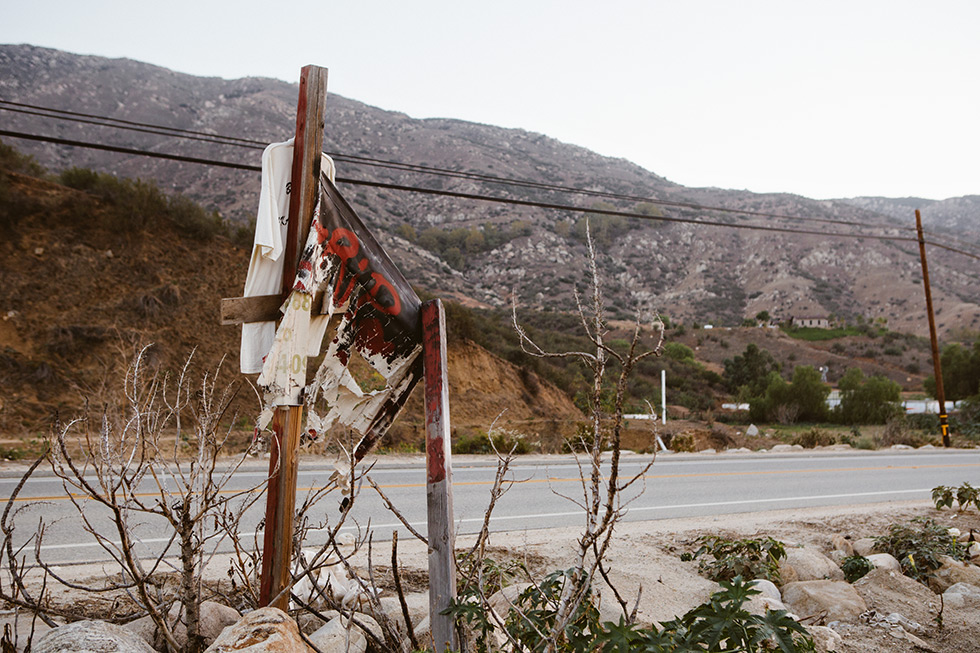
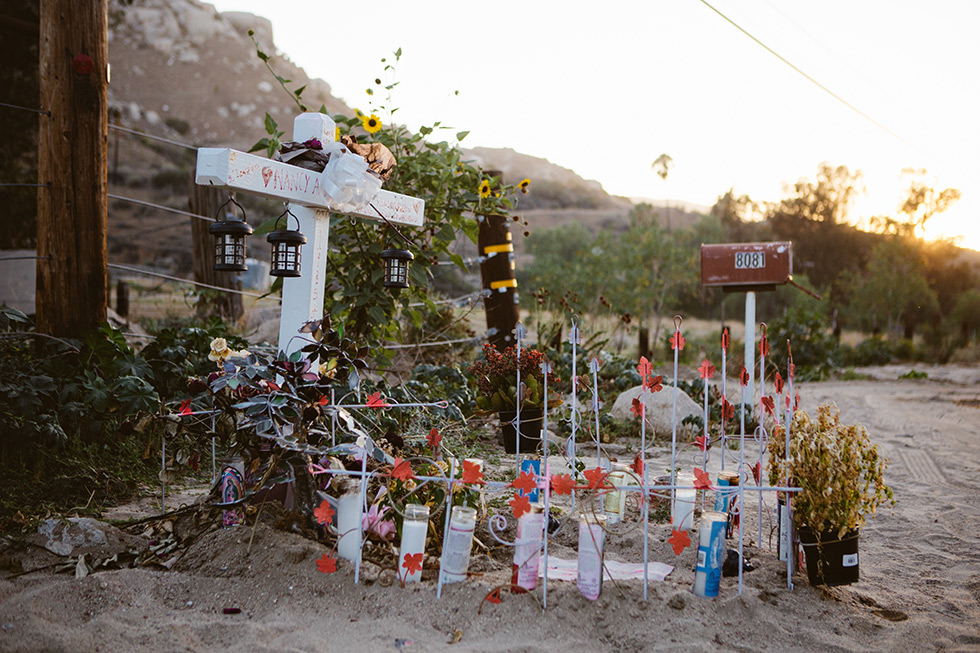
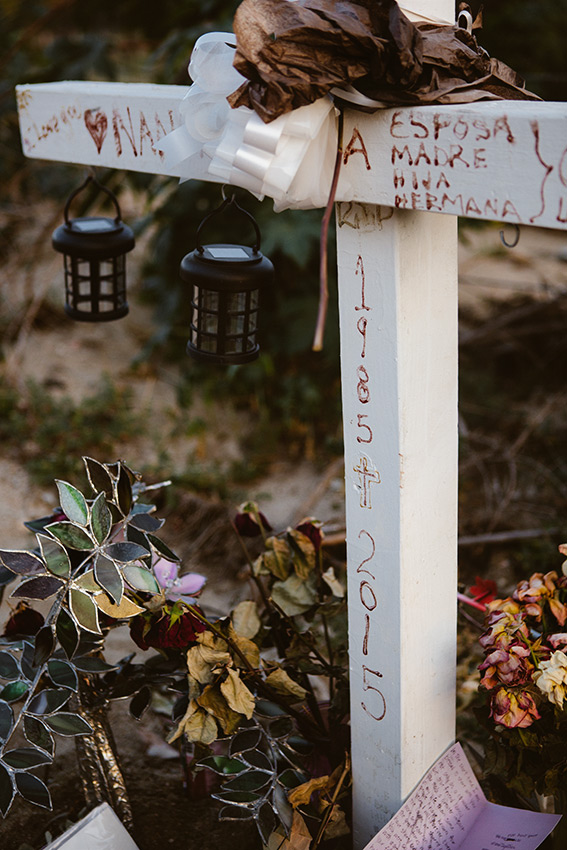
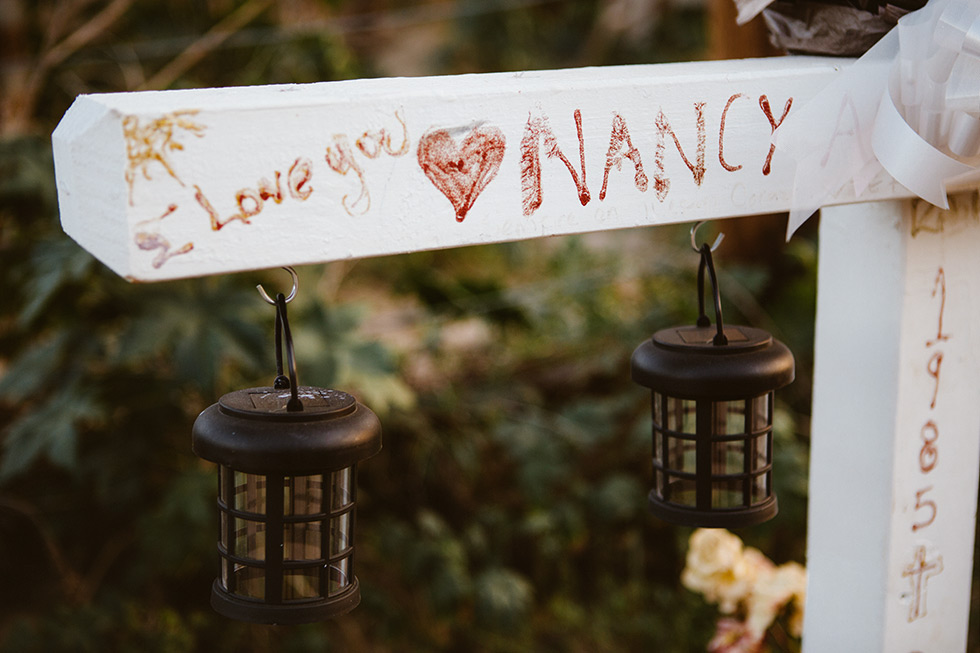
After the most recent death in August I decided to document 5 of the memorials with a small number of photographs. Since the local transit authorities apparently hate their residents I expect there will be more memorials to come, unfortunately.

Colton roadside memorial

Reche Canyon drunk driver

Reche Canyon RIP

Colton memorial

Moreno Valley roadside memorial

Reche Canyon memorial

Colton traffic death

Reche Canyon death

Reche Canyon grave

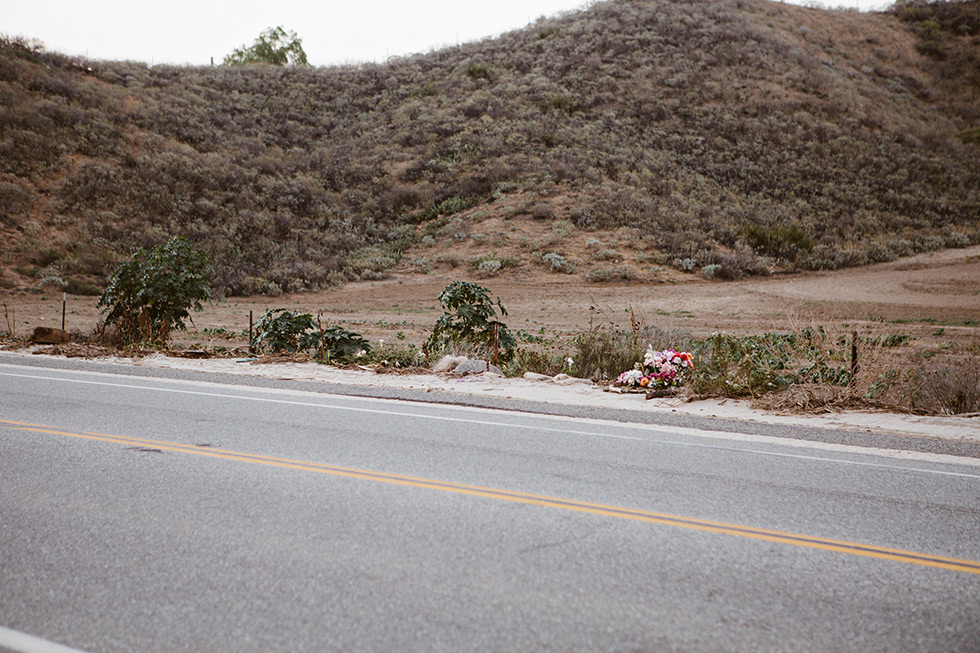
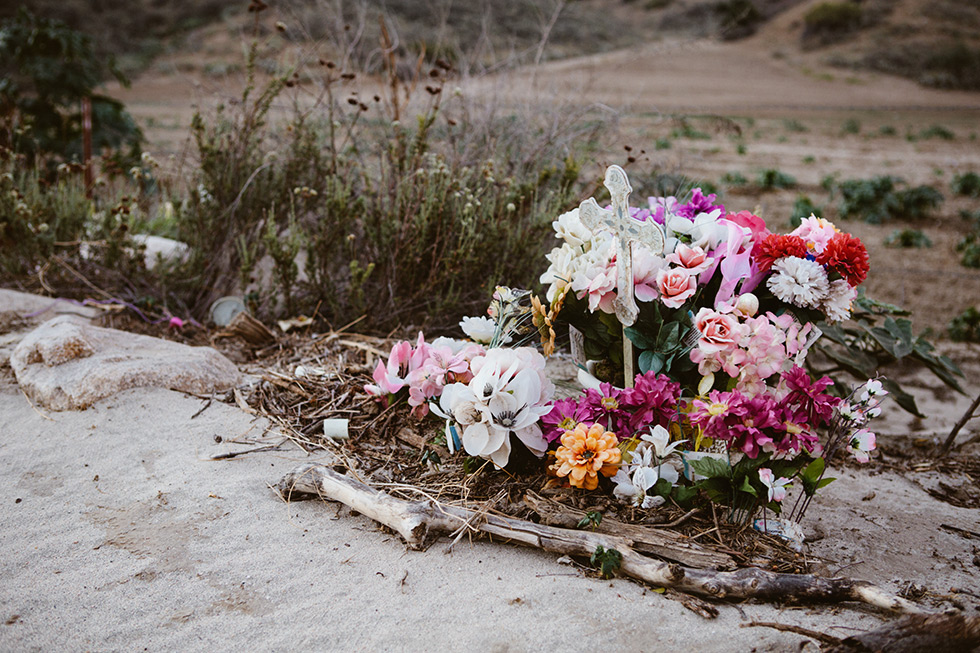
As I was taking that last photo above, I heard two engines straining and then a horn. Looking up, I saw yet another person crossing the double-yellow to save 20 seconds on their commute.

Reche Canyon, Colton, bad drivers

Fortunately there was no accident this time, although the day after I first published this I heard that there was another collision in the canyon. Sigh. Life (and preventable deaths) goes on I guess.

birdyTake a look at the rest of my site for more photos, most of which aren’t sad.

Comments { 40 }

Understanding Shutter Speed

There are three components to every exposure: shutter speed, aperture, and ISO speed. In order to get a correct exposure, each of these three values must be adjusted in a relationship. We’ll look at how that relationship works in a subsequent article, but for now, we’ll look at shutter speed.

The shutter on your camera controls two different aspects of each picture: the amount of light that can hit your film or sensor, and the amount of motion blur that may or may not result.

Let’s look at the light aspect first. Shutter speeds are notated by lengths of time, such as 1 second, 1/2 second, or 1/1000 of a second. The longer the shutter is open, the more light will be recorded on our film or sensor.

Let’s suppose that you’re thirsty, and that a 12 oz glass of water would be enough to quench your thirst. You can fill the glass slowly or quickly, but at some point the glass is full. This is the correct amount of water. If you leave the faucet open for too long, it will overflow and you’ll have wasted water. If you turn it on for too short, you’ll still be thirsty.

The shutter is very similar. If you open it for too long, too much light will enter your picture and it will be “blown out.” You’ll have wasted the photo. If you open the shutter for too short a length of time, you won’t have “poured” enough light into your photo and it will be too dark.

The second consideration we have about shutter speed is how it affects the blur (or lack thereof) in our picture. Let’s say that we want to take a photo of a jogger. Our camera tells us that a 1-second shutter speed is needed to get a proper exposure. If we keep the shutter open for 1 second, the jogger will have traveled several feet and our camera will have recorded the entire sequence in one big blur.

On the other hand, if we had used a shutter speed of 1/250 of a second, the jogger might not have traveled any distance. Consequently, our jogger will seem as though they’re frozen in time.

For most pictures, we don’t want any blurring to occur. In these situations, it’s important to use a fast shutter speed to freeze the action. Note that we humans often shake a little when holding a camera (heavy ones in particular), so we need to make sure our shutter is faster than our movement is. Many photographers try to use a shutter speed of 1/125 S or faster when hand holding their camera to prevent their shaking from blurring the photo.

In some cases, you want to imply motion, so you would choose a longer shutter speed. You might do this to make star trails at night or to record the paths of tail lights from cars. If you have the option, it’s often useful to use a tripod to minimize undesired blurring.

Comments { 0 }

Understanding Aperture

There are three components to every exposure: aperture, ISO, and shutter speed. In order to get a correct exposure, each of these three values must be adjusted in a relationship. We’ll look at how that relationship works in a subsequent article, but for now, we’ll look at aperture.

Aperture controls two aspects of every photo. The first is the amount of light that strikes our film or sensor, and the second is the depth of field in our image (more on that in sec).

Let’s look at the light issue first. Imagine that you have a pair of sunglasses on. If you add another pair on top of the first, the amount of light that can reach your eyes is reduced. If you add more sunglasses, the light reaching your eyes will be reduced still further until you add so many that the scene is too dark and you can’t see anything. On the other hand, if you don’t have enough sun protection on, the scene might be too bright and you’ll have to squint.

The aperture opening is similar to this. The bigger the aperture, the more light can get to our digital sensor. The smaller the aperture, the less light can get in (sort of like adding or subtracting sunglasses). What confuses a lot of new photographers is that bigger apertures are represented by smaller numbers. For example, f/2.8 is a larger aperture than f/11. This is because the aperture is a ratio, the details of which we don’t need to get into now. You just need to know that when you’re considering which aperture to use, the smaller the number the greater the amount of light.

The second aspect of photography that aperture affects is called the “depth of field.”  In it’s simplist form, this is the amount of our picture that is in focus. (It may be helpful to think of depth of field as “depth of focus.”) As a general rule, the larger the aperture, the less of our picture will be in focus.

For the sake of illustration, let’s suppose that we’re taking a picture of a flower in front of a bush. The flower is about 3 feet from our camera. If we shoot with a larger aperture (say f/2.8), the flower will be in focus and the bush in the background will likely be out of focus. If we shoot with a smaller aperture (say f/22), the flower and the bush will probably both be in focus.

Look at the pictures below. The top picture uses an aperture of f/16, and we can see that the bush in the background is somewhat in focus. In the bottom picture, we’re using f/2.8. Note how the bush in the background is now very blurry, and parts of the surrounding flowers in the foreground are also starting to blur.

The top picture is f/16, while the bottom is f/2.8. Notice the large shift in depth of field.

Which type of effect you choose is a creative decision, although at times it may be determined by the amount of light in the scene. For example, if you want to have an entire scene in focus but it’s dark out, you may need to use a wide aperture to let in more light. Doing this might reduce the depth of field. The opposite would be true of course: if it’s very bright out you may not be able to use a large aperture, and may get more of the scene in focus than you desire.

Comments { 0 }

Putting It Together: Understanding Exposure

In previous sections, we’ve looked at each of the individual puzzle pieces that go into making a final exposure. To recap:

Shutter speed controls motion blur (or lack thereof) as well as the amount of time that light can strike the sensor (or film). The longer we keep the shutter open, the more light that will hit the sensor. At the same time, if the shutter is kept open for too long, items in the picture may look blurry from movement.

Aperture controls the depth of field (how much of the image is in focus), as well as the amount of light that can hit the sensor. Generally speaking, as we increase the size of the aperture, we decrease the amount of our image that will be in focus. Additionally, if we use a wider aperture more light will hit the camera sensor. Don’t forget: larger apertures are expressed as smaller numbers: f/2.8 lets in more light than f/22.

The ISO is the measure of how sensitive a digital sensor or film is to light. As we increase ISO, the more sensitive our sensor is. However, as we increase the ISO, the more likely we are to introduce “noise” into our exposure, degrading image quality.

So…how do we put this all together? Basically, as we change one of the above items, we need to change the other two to ensure a correct exposure. To help illustrate this, let’s do a tiny bit of algebra:

Shutter Speed + Aperture + ISO = Exposure

Forget for a second what the real values of those need to be; let’s assume that they should all be a value of 1, whatever that means. By adding them up, our correct exposure should be 3:

S + A + I = E

1 + 1 + 1 = 3

Let’s say that we want to double our shutter speed because we’re getting motion blur. If we still want an exposure value of 3, we will need to adjust either our aperture or our ISO, like so:

S + A + I = E

2 + 0 + 1 = 3 or

2 + 1 + 0 =3

If we double our shutter speed but don’t compensate by changing one of the other items (aperture or ISO), our exposure will be too dark. In this case, we get a value of 4, which is wrong:

S + A + I = E

2 + 1 + 1 = 4

In the real world, which of the three exposure pieces you change will depend on a number of factors, but most often it will be for creative control. For example, let’s say that you want a very shallow depth of field, so you open the aperture as wide as you can. In doing so, you may let in too much light, so you can make the shutter speed faster (e.g. go from 1/125s to 1/250s), or can decrease the ISO (e.g. 400 to 200).

Suppose your camera is set to the following: 1/125s, f/4, and ISO 1600. You look at the picture and are unhappy with the graininess resulting from the high ISO. To compensate, you step the ISO down to 400. If you don’t change the aperture or shutter speed, your image will be too dark. So which do we change?

If we slow down the shutter speed to 1/30s, we’ll let in enough light, but our subject might get blurry. And unless you have a really expensive lens (or something called a “prime” lens), there’s a good chance you won’t be able to open your aperture past f/2.8, which you would need.

The answer then is probably to change both. If we change the ISO from 1600 to 400, we’re adjusting the exposure 2 stops. We can recover those stops by changing the shutter speed and aperture 1 stop each. In this case, that would mean changing the shutter to 1/60s and the aperture to f/2.8. At 1/60s, it’s possible you may be able to avoid a blurry subject, in which case your exposure will have worked.

The easiest way to begin expirmenting with these relationships is to try out your camera in either aperture or shutter priority modes. In these modes, you pick either the aperture or shutter speed, and the camera automatically sets the other one for you. Try using the camera in one of these modes and then changing the aperture/shutter speed. See what the camera does to the other when you make the change.

Comments { 0 }